The Ultimate Guide to Boat Lift Cable Replacement
Why Boat Lift Cable Replacement Is Critical for Safety and Performance
Boat lift cable replacement is the process of removing worn, corroded, or damaged steel cables from your lift system and installing new ones — before they fail and drop your boat into the water.
Here’s what you need to know at a glance:
- Replace galvanized cables every 2–3 years (or sooner in harsh conditions)
- Replace stainless steel cables every 4–9 years depending on water conditions
- Replace immediately if you see fraying, rust, kinks, or broken strands
- Replace all cables at once if they are the same age — don’t wait for the next one to snap
- Use stainless steel in saltwater; galvanized steel works well in freshwater
- Never try to stretch another season out of a visibly worn cable — the risk simply isn’t worth it
Your boat lift cables do one job: hold your boat safely above the water. When they work, you don’t think about them. When they fail, the consequences can be serious — a damaged boat, an injury, or both.
Cable failure doesn’t always announce itself. Internal abrasion builds up silently as the individual wire strands grind against each other around the winch drum. By the time you see visible fraying on the outside, the cable may already be significantly weaker than it looks.
The good news is that cable replacement is a manageable task when you know what you’re doing. Whether you’re a hands-on boat owner or you want to hand this off to a professional marine contractor like Bluetide Marine Construction, this guide walks you through everything — from spotting early warning signs to choosing the right cable material, routing it correctly, and keeping it in top shape season after season.

Understanding When to Perform a Boat Lift Cable Replacement
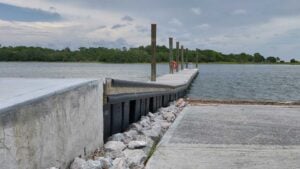
Knowing exactly when to pull the trigger on a boat lift cable replacement can be the difference between a relaxing weekend on the water and a catastrophic equipment failure. In the Lowcountry, our cables work hard against humidity, salt, and heavy tidal shifts.
Cables don’t just wear out on the surface. They experience internal abrasion caused by individual wire strands moving at different speeds as they bend around the winch drum. This friction creates heat and wear that you can’t always see from the outside.
Signs You Need a Boat Lift Cable Replacement
If you notice any of the following, it is time to stop using the lift and start the replacement process:
- Fraying and “Meat Hooks”: When individual wires in the strand break, they curl outward. These are often called “meat hooks” because they will easily tear through skin or clothing. Always wear leather gloves when inspecting cables. You can see an example of frayed cables here.
- Heavy Corrosion and Rust: While some surface discoloration is common on galvanized steel, deep pitting or corroded and frayed cables indicate that the structural integrity is compromised.
- Kinks and Bird-Caging: A kink is a permanent deformation where the cable was bent too sharply. “Bird-caging” occurs when the outer strands pull away from the inner core, often caused by sudden “shock loading” from waves or improper winding.
- Sluggish or Uneven Operation: If one side of your cradle is lagging or you hear popping and grinding sounds during operation, a cable may be stretching or slipping.
- The Age Rule: Even if a cable looks perfect, we recommend replacing galvanized cables every 2 years and stainless steel every 4 to 9 years. Additionally, if you hit 200 up-and-down cycles before the time limit, it’s time for a change.

Professional vs. DIY Boat Lift Cable Replacement
We often see boat owners weighing the cost savings of a DIY job against the peace of mind of a professional installation.
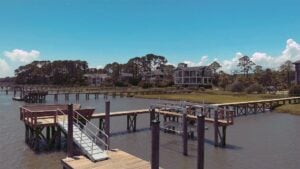
The DIY Path: Doing it yourself can save you a significant percentage on labor costs. It’s a rewarding project for the “family handyman” who has the right tools and a calm day to work. However, it requires a deep understanding of your specific lift model (like ShoreMaster or vertical lifts) and the physical strength to handle heavy cradle beams.
The Professional Path: Hiring a pro ensures the cables are sized correctly for your boat’s “wet weight” and that the system is perfectly leveled. Professionals have the insurance and expertise to identify secondary issues, like worn pulleys or motor bearing fatigue, that a novice might miss. In areas like Charleston and Johns Island, where tidal surges add extra stress to lifts, professional calibration is often the safest bet.
Choosing the Right Materials and Sizing
Selecting the wrong cable is a recipe for disaster. You need to match the material to your environment and the strength to your boat’s weight.
Galvanized vs. Stainless Steel
| Feature | Galvanized Steel | Stainless Steel (304/316) |
|---|---|---|
| Best Environment | Freshwater | Saltwater / Coastal |
| Typical Lifespan | 2–3 Years | 4–9 Years |
| Flexibility | High | Moderate (Prone to work hardening) |
| Corrosion Resistance | Moderate | Very High |
In the Lowcountry, we almost exclusively recommend 316 Stainless Steel. While 304 is common, 316 offers the best resistance to the salt-heavy air and water of Southeast South Carolina.
Understanding Cable Construction
Most boat lifts use 7×19 aircraft grade cable. This means there are 7 main strands, each made of 19 individual wires (133 wires total). This construction provides the perfect balance of strength and flexibility needed to wrap around winch drums. Some heavy-duty lifts use 6×36 construction, which is even more flexible due to thinner individual wires.
Sizing and Safe Working Load (SWL)
Never choose a cable based on its “Minimum Breaking Strength.” Instead, look at the Safe Working Load (SWL). We always apply a 20-25% safety margin.
To calculate your needs, determine your boat’s true wet weight. This includes:
- The manufacturer’s dry weight.
- Full fuel tanks (Gas is approx. 6.3 lbs/gal).
- Full water/waste tanks.
- Batteries, coolers, and gear.
- The weight of the lift cradle itself.
Common diameters include 1/4″ (SWL approx. 1,600-1,750 lbs) and 5/16″ (SWL approx. 2,250-2,450 lbs). If your boat is over 6,000 lbs, your system likely requires “compounding” (using multiple parts of cable to share the load).
Step-by-Step Guide to Boat Lift Cable Replacement
Before you start, gather your tools: wrenches, wire cutters, a drill, a level, and heavy leather gloves. Safety first: Disconnect the power to the lift to prevent accidental activation.
Preparing for Your Boat Lift Cable Replacement
- Remove the Boat: Never attempt a boat lift cable replacement with the vessel on the lift.
- Secure the Cradle: You must support the cradle beams so they don’t drop when the cables are cut. You can use nylon strapping, heavy chains, or even large floats in the water to take the pressure off.
- Measure Twice: Verify your cable length and diameter against your manufacturer’s manual before removing the old ones.
Routing and Securing New Cables
- Remove Old Cables: Carefully unwind the old cable from the winch drum and pull it through the pulleys.
- Attach to the Winch Drum: Insert the fused end of the new cable into the drum. Many modern lifts use a wedge lock or a copper stop to seat the cable securely.
- Thread the Pulleys: Follow your manufacturer’s diagram exactly. If the cable gets stuck at a pulley, try twisting it gently as you push it through.
- Secure the Ends: Use drop forged clamps and thimbles to protect the cable at connection points. Thimbles are vital; they prevent the cable from kinking or crushing at the eye bolt.
- Wind the Drum: Ensure the cable stacks evenly on the drum without overlapping or leaving gaps. This prevents the “backlash” that can cause the cradle to drop suddenly.
Post-Installation Leveling and Maintenance
Once the cables are in, you aren’t quite finished. You need to ensure the lift is level so your boat sits correctly and the load is distributed evenly across all cables.
Leveling Cradles
The easiest way to level your lift is the water level method. Lower the empty cradle until it is just touching the surface of the water. Use the water line as your guide to see which corners are high or low. Adjust the cable length at the winch or via the wedge locks until the beams are perfectly aligned with the water surface.
Ongoing Maintenance
- Rinse with Fresh Water: Especially in Charleston and the Lowcountry, rinse your cables with fresh water after every use to remove salt deposits.
- Lubrication: Use a penetrating oil or a dedicated cable spray lubricant. Avoid thick grease, as it can trap moisture and salt against the strands, accelerating corrosion from the inside out. Apply this seasonally (Spring and Fall).
- Monthly Inspections: Run your hand (in a leather glove!) along the cable once a month to feel for burrs or kinks.
- Keep a Log: Note the date of your last boat lift cable replacement and your last lubrication session. This helps you stay ahead of the replacement cycle.
Frequently Asked Questions about Boat Lift Cable Replacement
How much does it cost to replace boat lift cables?
While we don’t list specific prices, a DIY job generally costs the price of the cable and hardware kits. Professional labor rates vary depending on the complexity of the lift (vertical vs. hydraulic) and the accessibility of your dock. Trying to squeeze an extra year out of an old cable to save a few dollars isn’t worth the risk of a multi-thousand-dollar boat repair.
Can I use galvanized cable in saltwater?
Technically, yes, but we strongly advise against it. In the saltwater environments of Southeast South Carolina, galvanized cables can begin to fail in as little as 6 to 12 months. The zinc coating is quickly sacrificed, leaving the steel vulnerable to rapid structural failure. Stainless steel is the industry standard for coastal safety.
How do I find the correct cable size for my lift model?
The best way is to consult your manufacturer’s manual. If that isn’t available, you can measure the diameter of your current cable with a caliper and check the model plate on your winch or lift frame. For ShoreMaster or other specific brands, you can find model-specific cables here.
Conclusion
At Bluetide Marine Construction, we believe that proactive maintenance is the hallmark of a responsible boater. Your boat lift is an investment designed to protect your other investment — your boat. Don’t let a worn-out cable be the weak link in that chain.
Whether you are performing a boat lift cable replacement yourself or looking for expert help in Charleston, Johns Island, or the surrounding Lowcountry, always prioritize safety and high-quality materials. If your cables are showing signs of age, or if you simply can’t remember the last time they were changed, now is the time to act.
For more information about marine construction and professional lift services in Charleston, reach out to us. We’re here to keep your waterfront experience safe, smooth, and stress-free.